Project Overview
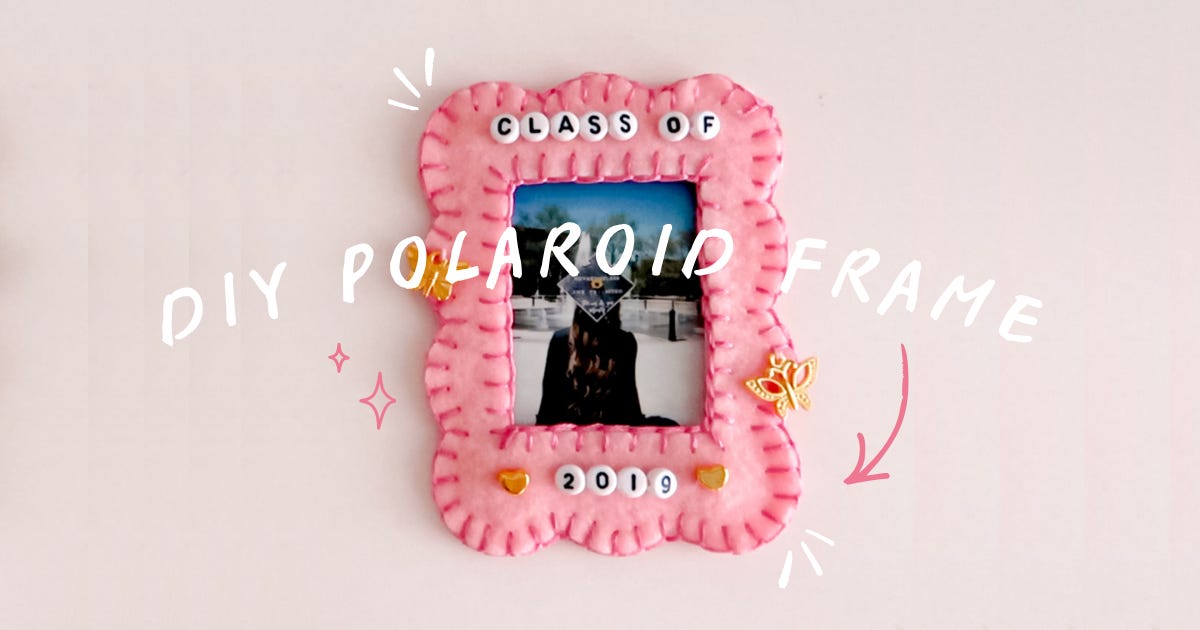
I finally made the felt photo holder that has been all over my Pinterest lately (and yes... it’s trending for a reason 😭✨)
These frames are soft, customizable and one of the cutest ways to display tiny memories.
And the BEST part? The photo slides in and out so you can swap it out whenever you want!
Felt Polaroid Frames are Perfect for:
best friend gifts
photo booth strips
dorm decor
locker magnets
…for literally anyone!
✂️ Supplies You’ll Need
Cricut (Maker model for cutting the felt!)
Felt
Polaroid Photo (from polaroid camera)
Gold Charms (butterflies)
📲 SVG / Template Download
The SVG files for this project are waiting for you inside my crafty inner circle ✨
(A.K.A., my paid Substack besties… you get all the good stuff every month! 🤭)
P.S. If you’re not already getting your monthly SVGs, this may be your sign!
🛠️ Instructions
Step 1: Upload the Polaroid Frames to Cricut Design Space
First, upload the downloadable PNGs into Cricut Design Space. You’ll receive both a front and back layer.
The polaroid frame will vary in size depending on the size of your polaroid photo, but most polaroids are about the same (2” x 3.3” inches). Double check yours, but these are the measurements I used:
Full Polaroid Frame Size: 3.4”W x 4.5”H
Once both layers are sized equally, you can adjust the colors.
Need the full video tutorial? Watch it below!
Step 2: Prep the Cricut Mat + Cut the Felt
Next, prepare your Cricut Mat by placing your Felt onto the FabricGrip mat, and switch out your blade to the Rotary Blade.
Remember to cut:
Front Frame Layer (open)
Back Frame Layer
Then, let the Cricut cut your felt!
Cut Setting: “Felt, Acrylic Fabric” with More Pressure
Step 3: Stitch The Inside Front Frame
Once your Cricut is finished cutting the felt, gently remove both layers from the mat and start with the front layer!
First, you’ll stitch around the inner photo opening using a blanket stitch. I show this process briefly in my video tutorial, but if you need more help, watch this video!
This gives it that soft, handmade look and helps reinforce the frame opening.
Step 4: Add Charms + Accessories
Before attaching the front and back layers together, decorate the front!
I added:
letter beads
charms
other little beads
Remember to use a smaller needle when threading beads. Trust me, it makes life easier 😅
Step 5: Sew The Front + Back Layers Together
Next, it’s time to attach the front and back felt pieces together using another blanket stitch!
Start at the top right corner and work your way around.
🚨 IMPORTANT: If you want to replace your polaroid photo, only fully stitch the top front layer. This will leave the photo opening accessible so you can slide any photo in and out of the frame! If not, simply insert your photo, then stitch both layers together to close the frame.
Step 6: Add Magnets
Attach 2 magnets to the back so you can display it on items like:
lockers
fridges
magnetic boards
craft carts
This is optional (you can also add a string to make it into an ornament!)
Step 7: Insert Your Polaroid Photo
Finally, slide your polaroid photo into the opening, and now you officially have the cutest, tiniest memory frame ever 🥹📸✨
Tips to Remember
Use the Rotary Blade. For cleaner, precise felt cuts, using the rotary blade makes a HUGE difference compared to the fine point blade!
Don’t Stitch the Photo Opening Closed. Remember to test and leave enough room for your polaroid photo to slide in easily. This project will NEED you to make a test cut, so you don’t waste your material or time!
Take Your Time Blanket Stitching. The blanket stitch will be the most time-consuming part of this project, so don’t rush! This stitch is what makes the project look polished and handmade.
📸 Share Your Project
If you make your own polaroid frame… I HAVE to see it because you can personalize it in SO many different ways, and I want to see yours!
Tag me @amymakesthat so I can hype you up and share your creation! 🤎